Showing posts with label Photography. Show all posts

Monday, December 16, 2019

The World's Best Camera Lens Focal Length Comparison Tool

camera lens focal length composite
17 to 600mm all in one shot.
There are tons of camera lens focal length simulator tools out there online today. They use varying degrees of sophistication in order to simulate the views offered by various lenses' focal lengths. Unfortunately, one important bit of information is often missing: scale. Sure, it's nice to play around with the fancy interactive simulators, zooming in and out in order to see what various focal lengths will look like but, without knowing scale, there is always a question of what a lens will do in a given situation, especially when shooting at long distances.

Recently, I was questioning how much I would gain by going over the 300mm in focal length offered by my Sigma 100-300 f4, which is, coincidentally, where most camera lenses commonly available at non-specialty retailers (think Best Buy or any other big box store that sells camera stuff) max out. In most basic form, lenses that go to 300mm (and typically start at 70/75mm) are a dime a dozen and can often be bought new for less than $200. Second hand, they can be had much cheaper. Want to go longer? Well, the price goes up a lot, which begs the question: are those extra millimeters worth the money?

As an example, let's look at Nikon and Canon, the world's largest interchangeable lens camera manufacturers.

Currently (December, 2019) Nikon's cheapest zoom lens maxing out at 300mm and usable on both sub and full frame models is the 70-300 f4-5.6G, which is selling for $170. Canon's closest comparable offering is the 75-300 f4-5.6 III model that sells for $180. Both lenses are easily in reach for someone who's willing to drop $500 for an entry-level camera kit.

Want more reach? Well, for an extra 100mm the price goes up-a lot!

Moving up to a zoom lens that maxes out at 400mm, there are a pair of 100-400mm lenses from third-party manufacturers Sigma and Tamron that have MSRPs of $800. Is that extra 100mm worth the extra $600? Well, ignoring the other factors that should go into making a lens purchase (optical performance, AF capabilities, build quality, weather-resistance, warranty), the jump in reach from 300 to 400mm really isn't all that much. How about 600mm? Both Sigma and Tamron make such optics, which provide a noticeable jump in reach, but which cost $1300 and $1400, respectively.

Think that's expensive? Keep reading.
Want to stick to name brand but keep roughly the same focal range? Well, you're looking at $2100 for Nikon's 80-400mm and $2200 for Canon's 100-400mm model. Paradoxically, Nikon makes a 200-500mm lens and sells it for a 'mere' $1400, which is perhaps the cost of losing 120mm of range (and a lot of flexibility) on the short end.

As for me, not seeing a focal length simulator anywhere that had known scales for both size and distance, I decided to create one for myself.

To start with, I knew that I had a way to get up to an equivalent 600mm focal length. To start, I would begin with my Sigma 100-300f4, the longest AF lens I currently own. On top of that, I also own a 200 f4 Ai Micro Nikkor, an old MF gem produced from the late 70s to early 80s before being updated to an Ai-s version. Having a native magnification ratio of 1:2, I bought a 2x teleconverter in order to boost my magnification to full 1:1 life size and the current standard for macro optics. 200mm doubled with the teleconverter becomes 400mm, which I could then take to 600mm by using the 1.5x crop DX mode available on my D700.

Focal lengths figured, I needed something to shoot. Walking down my driveway, I realized the answer was in front of me in both my street and the stop sign at the end of it. The standard American stop sign is 750mm (roughly 29 ½ inches) across, and there was one staring right back at me. As for finding distance, I was lucky in that my street is concrete with expansion joints cut at regular intervals. Measuring one section of street in feet and multiplying that times the number of sections all the way to the end resulted in a length of approximately 950 feet (290 meters), give or take a few feet.

Everything figured, I shot at 300, 400, and 600mm and then looked at everything on the camera. Realizing this was a good sequence, I decided to fill in the rest of the focal lengths offered by the rest of my other optics, which go all the way back to 17mm.

To use the gallery below, simply click on any of the pictures to open the gallery in a filmstrip view, then use the wheel on your mouse to scroll through the pictures, all of which have the focal length displayed in the upper left. Yes, this is nowhere near as sophisticated as most of the other lens focal length simulators out there but, on the other hand, it may be the only one on the web with known size and distance scales.

Oh yes, back to the 'are the extra millimeters worth the money' question. 300 vs 400mm? If you need to go long, skip the 400mm rip-offs as there's clearly not enough gain to justify the $600 premium over a 300mm optic for anyone on anything resembling a budget. Spend a little time and save a ton of cash by cropping your photos in the camera or on the computer as today's 20+Mp cameras have more than enough resolution to do so. If you really need reach via optics, go big or go home as there's nothing that can touch those zooms maxing out at 600mm from Sigma and Tamron and, as the pictures show, there is a ton of gain from 300 to 600mm. Yes, $1300-1400 is not cheap but it's a lot cheaper than buying a $800 lens that goes to 400mm, realizing that it's not enough, going back and dropping another $1400 on a lens that goes to 600mm, and then hoping to recoup as much as possible from your 400mm mistake.

Still not long enough for you? Well, it looks like you'll have to attach an astronomical telescope to your camera and use it an a lens.

In the end, though, only you can decide what's right for your specific needs.


Believe it or not, this 50mm shot is close to the field of view for most humans.


Like What You Read?

Why not check out other great stuff about photography, astronomy, associated gear, and how to use it.

Think someone else would find this informative (or at least entertaining)? Use the buttons below to share!


Sunday, October 31, 2010

Happy Halloween: a Haunted History of Spirit Photography

The most famous 'spirit' photograph of them all: Abraham Lincoln with wife Mary Todd.

What happens to us after we die? Do we go on to exist in some non-physical form or is death truly the end? Well, the answer to that question will probably never be found but the uncertainty created by death and longing for lost loved ones created a booming industry for photographers in the later part of the 19th century.

Enter spirit photography.


Almost as soon as the camera had been invented, some people started thinking that the almost magical photographic medium could be just the thing to prove the existence of spirits, and thus life after death. So far as we know, the first photograph of a supposed spirit was taken in 1860. However, while ghost photos started to appear sporadically in the years after, one event alone produced an onslaught of ghost photos: the Civil War.


The Civil War, which raged from 1861 to 1865 was the bloodiest war in American history, leaving over 625,000 Americans dead, more than were killed in every other American war combined. Needless to say, with so much sudden death, America in the late 1860s was not a happy country as it would probably have been impossible for any one family not to have been touched by the war. In this nationwide grief, some enterprising photographers saw the potential for big money.


While no one knows who made the discovery, by the 1860s, the double exposure was common knowledge among photographers. In doing a double exposure, the photographer would take a picture of someone against a black background and then reuse the plate for another shot. Result: an eerie, transparent figure of a person would be superimposed on the final picture. At the time, portraits would often need to be exposed for a few seconds so, by cutting the exposure short, the photographer could further muddle the 'ghost' and make it much harder for a clear image that could be identified by grieving relatives as their lost loved one.


In the wake of the Civil War, some photographers of questionable morals seized on this opportunity and public ignorance to make big, big money.

Of all the supposed spirit photographers, William Mumler of Boston, then New York was the most famous. At the time, getting one's picture taken was a big, and expensive, event. Mumler and other photographers, being careful to guard the double exposure secret, would then advertise that they had the ability to photograph spirits. Needless to say, with all the sudden death wrought by the war, people lined up for photos in the hope that their dead relatives would join them, paying far in excess of the normal portrait price and making the spirit photographers rich in the process.

With the general public ignorance about photography, it seemed as though this fraud could go on indefinitely. Unfortunately for the fraudulent photographers, the good times did not last.

In 1869, William Mumler was put on trial for fraud, with his accusers, among them, P.T. Barnum, stating that he was using double exposures to fake spirit photographs. While Mumler himself was acquitted of the charges as there was no hard evidence against him, his trial let the big secret of spirit photographers, double exposure, out into the open. Result: once everyone knew about trick photography, people were less inclined to line up for photos when they knew that they were, more than likely, being swindled.


By the turn of the 20th century, spirit photography as well as the whole spiritualism movement was consigned to the pages of history. However, while the spirit photographs of the 1800s have been essentially proven as fakes, the interest in catching ghosts on camera has not waned in the least. Just Google something to the effect of 'ghost pictures' for proof of this fact.


Some'ghost' photos from the 1800s


And now. . . the best for last. . .
                                                        Ghost snot! Eeeeeeeeewwwwwwwwww!!!!!


Like What You Read?


Why not check out other great stuff about photography, astronomy, associated gear, and how to use it.

Think someone else would find this informative (or at least entertaining)? Use the buttons below to share!


Thursday, October 14, 2010

Taking A Walk On The Dark Side: Canon vs. Nikon Ergonomics

The Nikon D200, originally a $1,800 camera from 2005 that can be had for around $600 used today.

Recently, I got the opportunity to shot with a Nikon, specifically, a D200, the father of the current D300s. Never having shot with a Nikon dSLR before, I was very eager to give it a try and see exactly what it was like on the other side of the fence, having been a Canon shooter since the day I got into dSLR photography.

Granted, it was a bit of an adjustment, but my, my, was I ever impressed . . .


Nikon Positives

Very comfortable in-hand.
The grip on this thing is absolutely amazing in that it is a very soft, almost sticky rubber that should afford a firm grip even with sweaty hands in the middle of summer.

Great for manual focus.
Until Canon incorporated interchangeable focus screens in its mid-level dSLRs, we could just about forget thinking of manually focusing our lenses. On the other hand, the D200 is just as good as my 45-year old Canon FTQL film camera that was made for such focusing.

Setting lock buttons.
Granted, this isn't a problem for me but it must be for some people as Nikon incorporated setting lock features on the camera to prevent accidental switches during shooting.

Better AF point spread.
The Canon's 9 vs. the Nikon's 11 AF points doesn't seem like much of a difference until you see how they're laid out in the viewfinder. Canon's diamond pattern can make portrait shooting interesting (in a bad way) while the more conventional Nikon grid makes it a snap, or, in this case, a click.

AF assist lamp/built-in intervalometer
All the Nikons have one of these (heck, even my $100 Olympus P&S does) while not a single Canon SLR has since 2002. Instead, Canons with a pop-up flash pop the flash and emit bursts of strobe to act as the AF assist. Besides being ineffective, this will annoy subjects and potentially get you thrown out of a public venue for being a PITA. AS for the intervalometer, Dxx Nikons and up have them while no Canon does.

Quiet
This is undoubtedly the quietest dSLR I've ever used.

Metering mode button
On Canon, you have to change the metering on the LCD. On Nikon, just turn a button.

External file format control.
On a Canon, if you want to change your file quality settings (RAW, JPEG, RAW+JPEG), you'll have to dive into menus. On the D200, hit a button and then adjust in the topside LCD screen.

Dedicated ISO, white balance, and drive controls
On mid-level Canons, if you want to adjust these things, you'll have to use the dual function buttons. On Nikon, you have single function buttons for ISO and WB. For drive, it's even better as all you have to do is spin a wheel, which eliminates the need to look at a LCD display altogether.

External image protect button
Again, if you want to protect your image on a Canon, menu-diving is required. On the Nikon, just press a button on the back of the camera.

Better located depth of field preview button
The Nikon's DOF preview is on the right side of the lens mount, which means that you can just move a finger to touch it as you are free to play with the lens using your left hand. On the Canons, this button is on the left side, which means that you have to take your hand off the lens while previewing your DOF.

Weather-sealing
Yes, the D200 isn't sealed as well as its successor, but it's better than any Canon until you get to the 7D, which costs around $1,500.

Better on-off-light switch
People with a need for speed will appreciate the under the shutter finger location of the D200's on-off switch. In addition, the control for the light on the top LCD is here, too. On the Canon, it's not as conveniently-placed being located nearest the viewfinder chamber.

Nikon Negatives

Aperture rings on old lenses
On the old non-G Nikon mount lenses, the aperture ring has to be stopped down to minimum aperture for the camera to work. Unfortunately when shooting, it's really easy to bump the aperture ring and thus stop the camera from working.

Thread-on port covers
Yes, it's a sturdier design than the Canon flaps, but, since these covers come off the camera, they could be very easy to lose, too.

No quick control dial
Canons have the wonderful, intuitive quick control dial that allows users to blast through menus at near warp speed. Nikon only has a 4-way joystick (Canons have one, too). True, this is a lot better than the set of 4 buttons on lesser cameras, but still not as good as the rear wheel on the Canons.

Focus mode control on front of camera
Maybe Nikon just ran out of space on the back of the camera or maybe the designer came to work with a hangover that day, who knows. Either way, placing a 3-way control in a place where the photographer can't even see it wasn't a good idea.

Well, there it is in a nutshell. Yes, I didn't get all that much time to play with the D200 when it came to diving through menus but I did manage to get a good feel for the external part of the camera which does, needless to say, have a lot of great things about it.

Again, this reiterates the wise advice that, when buying the camera, in-hand feel and ergonomics, not just the spec sheet, should play a large part in making the decision. Besides this, when shot in RAW, all cameras are pretty much equal, anyway.


Humble requests:

If you found this informative (or at least entertaining), help me pay my bills and check out my Examiner pages for photography and astronomy for more great stuff.

Think this was cool? Why not tell a friend?

For something even better, become a follower.

Tuesday, September 28, 2010

Getting The Most Fall Color Out Of Your Pictures

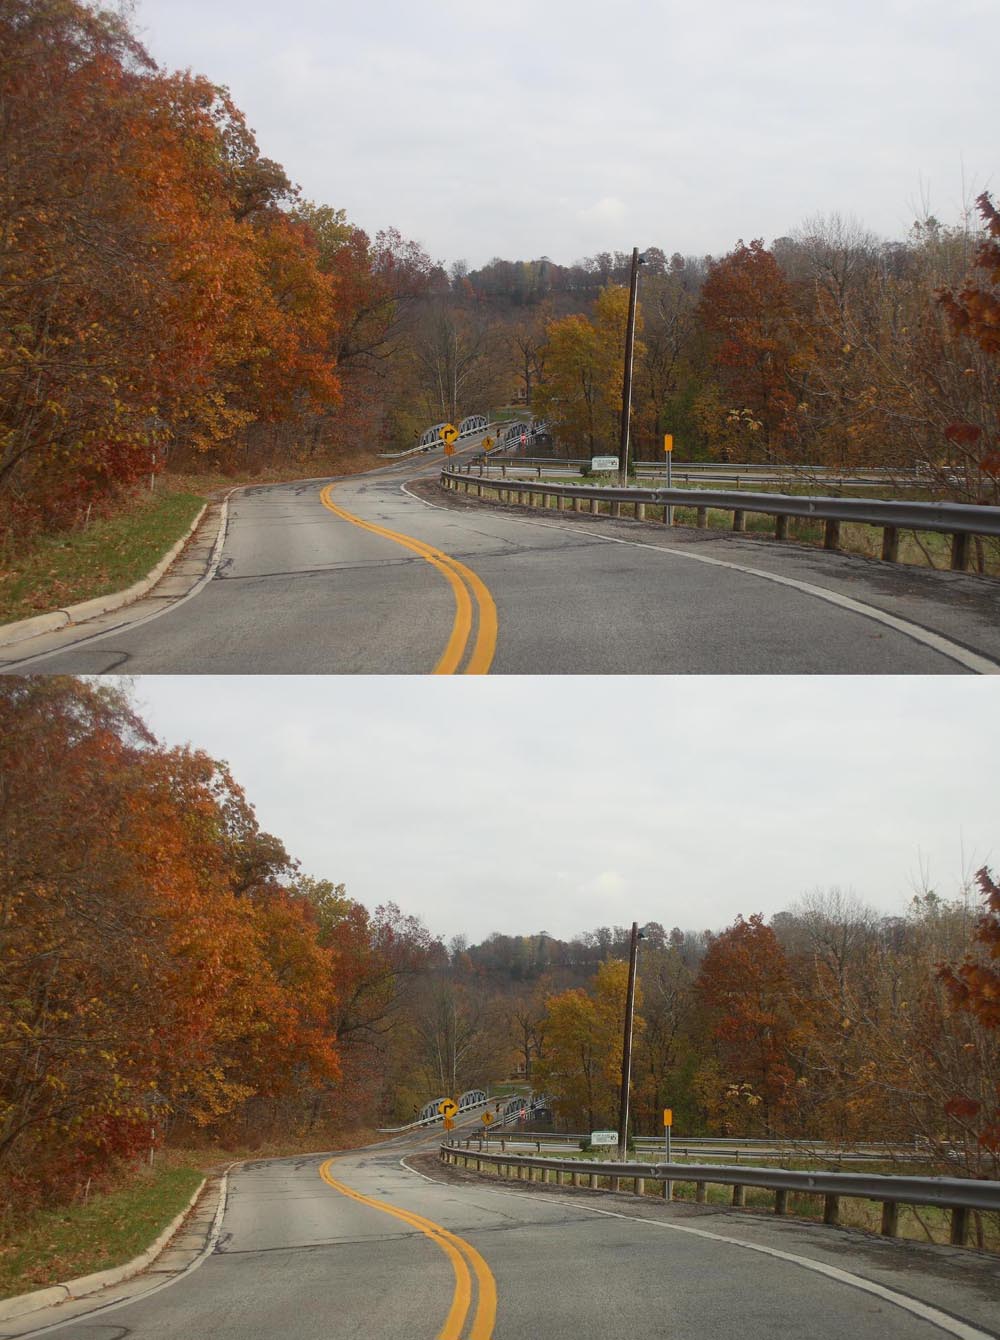
With a little know-how, colorful fall pictures can be made even better.

Well, for those of us living in the Northern Hemisphere, it's been fall for almost a week now. For those of us living in certain areas of the world, fall means colorful foliage.

So how to get the most out of your fall pictures?

For one thing, shoot your camera using the RAW format. Yes, JPEG allows for some color-related editing, but with RAW, the number of ways to tweak the colors increases dramatically, as does the ease of doing so. Yes, RAW mandates post-processing, but in the end, many people who are serious about their digital pictures will agree with me that RAW rules.

AUTHOR'S NOTE :For the examples and screen shots that follow, I am using Canon's Digital Photo Professional (DPP) RAW editing software that came bundled with my EOS 30D. If you shoot something else, your RAW editor will be different, but the overall functions should remain the same.

Onto making your colors “pop.”

First thing: Examine the picture
This is a lot easier if you just came in from a shoot. Chances are, upon opening the picture, you will notice that the colors in rthe picture probably aren't as vibrant as you remember them.

Option 1: Boost Saturation
By far the simplest operation, boosting the saturation is simply what one can do in Photoshop or the like. Simply find your saturation controller and kick it up a few notches. On DPP, I can take my 30D 4 steps up (increasing saturation) or 4 down (decreasing saturation). In my opinion, a setting of +2 works best as the change is noticeable, but the picture sill looks like a picture, not a painting.


Option 2: Adjust white balance
The reason I love RAW so much is that, should you mess up the white balance setting when shooting, there's no worry, you can just go back and fix it later on the computer. True, when one thinks of white balance, one usually thinks of major mistakes,, such as shooting tungsten under daylight. However, more subtle mistakes can kill your colors. Just by clicking on the correct white balance setting for the conditions in which the picture was shot can help render more vibrant, accurate colors.


Option 3: Picture styles
Besides white balance, picture styles can have a major impact on color rendition. Obviously for fall scenery, the landscape setting is the best. However, for anyone who demands the greatest accuracy, the setting that is an exact recording of color, 'faithful' in DPP, is another option.


Option 4: Dynamic range histogram
On DPP, there is a histogram function. While not directly impacting color, the way it plays with the light and dark will have an impact on how color looks. On DPP, moving left will lighten the lights. For color, this will often lead to a loss of saturation, but a generally brighter picture. Moving right will create a darker image, but one that appears more saturated in color.


Option 5: Any combination of the above
While each of the above four techniques can help boost color in your photos when applied correctly, try using any two or even all of them together, one can really add some fantastic colors to fall photos.


Like What You Just Read?

Why not check out other great stuff about photography, astronomy, associated gear, and how to use it.

Think someone else would find this informative (or at least entertaining)? Use the buttons below to share!


Tuesday, September 7, 2010

Tokina 28-70 f2.6-2.8 ATX PRO In-Depth Review

in depth review Tokina 28-70 f2.6-2.8 ATX PRO lensThe Tokina 28-70mm f2.6-2.8 ATX PRO


Tech Specs
Focal Length: 28-70mm
Dimensions: 3.2" x 4.8"
Weight: 760g
Maximum Aperture: f2.8
Minimum Aperture: f22
Diaphragm Blades: 8
Front Element: Rotates, extends about an eighth of an inch
Autofucus Mechanism: Micromotor (Canon), Mechanical drive (Nikon)
Closest Focus: 2.5 feet
Filter Size: 77mm


Background
Tokina's 28-70/80 f2.8 lenses have quite a bit of a convoluted history to them. Originally developed by French company Angenieux, Tokina bought the design and rolled out several versions before ceasing production in the mid 2000s. For the forthcoming review, I will be referring to the 28-70 f2.6-2.8 version, which was marketed as being the widest aperture zoom in the world (even though cameras do not recognize the 2.6 aperture. So, is this oldie a goody? Keep reading to find out!

See Also: How To Identify Tokina's 4 Different 28-70 Lenses

Build Quality: 5
Tokina is a company known for high standards of construction, and its 28-70 f2.6-2.8 ATX PRO lens lives up to the tough Tokina reputation. Upon picking up the lens, you immediately notice its sheer weight and perhaps, cool surface. This lens is solid metal and feels every bit of it, even the filter threads are metal. Yes, it may be a brick, but it inspires confidence in that it feels like a true photographic tool and not a toy like a lot of the newer offerings from both third-parties and now even manufacturers. The focus ring is the wide, outer one. Switching from AF to MF is a bit complicated. Unlike newer Tokina lenses, one must first flip a conventional switch (on the camera for Nikon or on the lens for Canon) and then snap the focus ring back or forth, depending on what you want to do. In addition, the clutch has a window where it can and cannot move. To find the spot, push/pull the ring as you turn. When the spot is reached, the clutch will engage and the ring will move, completing the transition. On newer Tokina lenses, you can simply snap the ring at any place to go from AF to MF and back and there's no need to flip any switches. The good news is that, like newer Tokina lenses, the focus ring does not spin in AF mode. In action, the focus ring is smooth in operation, no slop whatsoever. The zoom ring is the inner, narrower one. In action, it is smooth too. Remember, though, this lens will be at least 15 years old, so action on yours may vary. Both rings are rubberized, highly textured, and give a good grip. When zooming, the external length of the lens never changes, but the inner barrel drops about half an inch at the long end of the zoom and will rotate and move back and forth a few millimeters when focusing. For Nikon users, don't forget to set the ring to and then lock it at minimum aperture so that it works correctly.

Survivability
Here' it's a tale of two lenses. The Canon mount version has a built in motor, which means that, sooner or later, it will die, relegating this to a manual focus lens unless parts can be located. Out of production two decades now, that's unlikely. On the other hand, the Nikon version contains no motor, but is focused via a mechanical linkage that's driven by a motor in the camera, which means that the Nikon version should last forever. 


The inner barrel extends a few millimeters depending on focus.
Autofocus Performance: 4
Being an older model lens, the Tokina 28-70 f2.6-2.8 ATX PRO does not feature the latest sonic drive autofocus technology, but the old mechanical drive design for Nikon and an integrated micromotor for Canon. For Nikon users, this also means that this lens won't AF on low-level Nikon bodies, so be sure to check compatibility before buying. However, for such a design, autofocus performance is still good by modern standards. Sure, it's not sonic speed, but for what it is, AF is quick. In terms of accuracy, this is nothing to sneeze at, either. Focus is dead-on in all situations except when dealing with nearby, fast-moving subjects. Low light? No problem! Autofocus is top-notch here, too. Unfortunately, as is the case with other mechanical drive/old micromotor lenses, there is no full time manual focus, which means you need to flip switches and move rings.


Switching from AF to MF and back is a two-step process: first flip the switch, then move the focus ring accordingly.


Optics: 4
There is a lot that goes into determining the complete package of optical performance for a camera lens, so let's examine each of them individually. For APS-C shooters, consider the mid frame images here to be corners on your camera as the below images were shot on a FF Nikon D700.

28mm test images.
Lens at 28mm
At 28mm, the lens shows the famous 'Tokina glow' common to older designs when shot wide open. The center is sharp but sharpness will fall off through the corner, by which point things are looking pretty mushy. At f4, the center and mid frame are razor sharp and there is no improvement on stopping down. The corner will improve at f5.6 and again, though to a lesser degree, by f8, at which point the obvious mushiness is gone.


35mm test images.
Lens at 35mm
At 35mm, the lens finds its sweet spot, but the 'glow' is still there when shot wide open. The center is sharp and mid frame exhibits reasonable sharpness but, by the corner, sharpness clearly falls off though it is clearly better than at 28mm. F4 and slower for center and mid frame? See the 28mm commentary. The corner will improve through f8, at which point the lens is razor sharp from corner to corner, hence the sweet spot.


50mm test images.
Lens at 50mm
50mm is a complete repeat of 28 and 35mm in regards to the 'glow,' center, and mid frame performance. The corners, though, soften quite a bit with performance similar to at 28mm wide open. Stopping down does help but in the extreme corner of the frame, the mushiness never completely disappears.

70mm test images.
Lens at 70mm
70mm came as a surprise as the 'glow' just about disappears! Additionally, I would say that the f2.8 performance is actually at its best here when taken corner to corner. Stopping down to f4 will create razor sharp images at center and mid frame, like at the other focal lengths. The corners? Performance is worlds better than 50mm at any f-stop and mirrors that of the 28mm focal length, though it lags behind the 35mm setting a little bit.


Distortion.
Distortion
As is the norm with wide angle lenses, the Tokina 28-70 f2.6-2.8 ATX PRO exhibits barrel distortion on the wide end of the focal length spectrum. The good news is that, compared to some other standard zooms, it is very mild and disappears by 35mm. By 50mm, very slight pincushion distortion appears, but is nothing that to many would warrant correction in post-processing.


Vignetting.
Vignetting
This lens displays a lot of vignetting wide open across the focal range shot on full frame. Stopping down does change things, albeit to varying degrees. At 28 and 35mm, stopping down to f4 helps a little. At 28mm, going down to f5.6 further reduces the dark corners, but some shading will continue to appear even at f8. At 35mm, shading is drastically reduced at f5.6 and virtually disappears at f8. 50 and 70mm mirror each other in that, at both focal settings, closing up to f4 drastically reduces vignetting, which virtually disappears by f5.6.

Crop shooters? Vignetting should be just about non existent.


Chromatic aberration, 100% crops from 12Mp images.
Chromatic Aberration
While Tokina lenses are known for build quality, they are also known for a less than desirable feature: chromatic aberration, those annoying color fringes that appear in high-contrast situation. The bad news is that the 28-70 f2.6-2.8 ATX PRO does exhibit some false color. The good news is that stopping down from f2.8 to f4 greatly reduces or even eliminates the unwanted color in most cases. As usual, the higher the contrast, the more pronounced the effect


Flare/ghosts (or lack thereof).
Flare/Ghosts
By and large, I would consider this lens to be on the positive side of the flare resistance spectrum. The lens is most prone to flaring at 28mm because this is when the front element is nearest the end of the lens. As focal length increases and the inner barrel drops back into the lens, the front element becomes more shielded and thus, more resistant to flaring. Generally, this lens doesn't flare/ghost unless you have the Sun (or another extremely bright point source of light) in the corner of the frame. When a bright light is in the center, sometimes you get flare, sometimes not. Go figure. In the center, the lens sometimes flares and sometimes doesn't, go figure. As usual, a hood, whether the standard or a thread-on variety, helps.

The fact that the inner barrel drops at the long end of the zoom helps reduce risk of flare in itself.


This is no macro on APS-C, let alone full frame.
Macro
While this lens is not a macro optic, at can focus reasonably close and make itself a great lens for shooting flowers or similarily-sized subjects.


If you have really steady hands and no adverse reaction to ISO 3200+, astrophotography is possible! Here's Orion among some clouds.
Astrophotogarphy
On this lens, infinity is not infinity, which means that you'll manually have to fiddle with the focus on a bright star while using live view magnification. Focus found, thanks to its bright aperture and the insanely good high ISO capabilities of modern cameras, it's possible to photograph brighter constellations hand-held!


Value: 5 (Nikon), 4 (Canon)
When it comes to price to performance ratio, the Tokina 28-70 f2.6-2.8 ATX PRO is unequaled. Where else can you get a constant f2.8 zoom with so many positive attributes for in the $300 range? Nowhere. A good indicator of how good a lens is to look for it on the used market, see how much it pops up, and how long it sticks around when it does show up. Generally, the rarer a lens is, the better it is. In the case of the Sigma and Tamron full frame-capable constant f2.8 standard zooms of the same vintage, you'll see them all the time. The Tokinas? They don't pop up all that often and when they do, they're gone very quickly. This is a great lens, people know it, and the market shows it.

My only reservation here is for Canon users. Yes, you get way more than what you pay for but, on the other hand, should the motor in your lens fail, you're probably out of luck as this lens has been out of production since the early 2000s and there are probably no parts left with which to fix it. Nikon shooters? Buy with confidence! Because this lens contains no motor but focuses via mechanical linkage, it is practically indestructible and will keep making pictures long after your camera and expensive AF-S Nikkors have died.


In the field
There's a reason that constant f2.8 zooms are popular, they're just so doggone useful! While slower than primes, a constant f2.8 zoom give the photographer much more flexibility in making pictures, especially when mobility is an issue. Until a 18-70ish constant f2.8 lens comes out, we'll be forced to decide between wide (17-50) and long (28-70) if we want constant f2.8. With all of its positive attributes, the Tokina 28-70 f2.6-2.8 ATX PRO can make the perfect walk around lens, provided you're willing to trade off wide angle for extra reach.

While good at any time of day, the fast Tokina zoom really comes into its own when the light starts to disappear. Simply put, a 2.8 zoom can do things (especially on the long end of the range) that those 3.5-5.6 bundled kit zooms cannot, namely allow the photographer to shoot hand-held in low light without flash, which is good. In less than extreme low light situations, the extra stops of aperture allow the shooter to lower the ISO, thus preserving picture quality.


Indoor settings in low light are easy for a 2.8 zoom


Nightscapes, especially at Christmas, are easily possible without a tripod (note, no flare)


Even darker nightscapes are possible with steady hands

Nighttime architecture can be very cool

While not a dedicated macro . . .

However, it is still good for closeups of large objects. . .


. . . especially if you can crop a bit!

Simply put, a 28-70 constant f2.8 optic is a lens that will live on your camera most of the time. Sure, other focal ranges with different applications will be desired at times but, for the majority of walk-around type shooting, such a range will get the job done far more often than not.

Wildlife is no problem . . .

. . . especially if you crop


This is a great landscape lens anywhere throughout the range.


Competition
The standard zoom lens competes in a crowded market segment as such lenses are the go-to optics for many photographers, pro and amateur. As a result, everyone makes one. Closest in price to the Tokina are the older Tamron and Sigma models of similar vintage. Like the Tokina, all are constant f2.8 and are driven by a micromotor/mechanical drive mechanism. Unlike the Tokina, they are mostly plastic while the Tokina is solid metal. Moving up the scale are the current offerings, there are similar optics from both Sigma and Tamron, as well as Tokina's current 24-70 f2.8. These lenses can add any combination of the following features: sonic-drive AF, weather-resistance, and stabilization. The price goes up accordingly with these lenses typically selling for around $1,000, give or take a few hundred. Moving to the top of the ladder are the manufacturer optics from Canon, Nikon, and Sony, which can add any combination of the already listed features as well as at least another $500 to the price tag.
Crop shooters? Unless you're planning to go FF in the near future, skip this lens as its equivalence of 42-105mm on your camera is a bit awkward unless you do most of your shooting outside. If I was a crop shooter looking for speed in a zoom lens, I'd go for a constant f2.8 lens in the 17-50-ish range, of which there are many choices and which will provide an almost identical field of view that 28-70mm does on FF.


Conclusion: 4.5 (Nikon), 4.25 (Canon)/5
The Tokina 28-70 f2.6-2.8 ATX PRO is an all-around winner, especially considering its rock-bottom price point. Some pluses are undeniable. The Tokina's build quality is top-notch, equaling (and sometimes bettering) the manufacturer's own $1,500+ version lenses. Again, the price ($300ish) to performance ratio is unrivaled by anything else. The 'floating' focus ring is another convenience one normally associates with sonic-drive lenses, so feel free to grab the lens anywhere when shooting with it. The conventional drive focus mechanism does not offer full time manual override, but is nonetheless fast and accurate. The only mechanical/build gripe is the two-step AF/MF transition. Optically, this lens has more positives than negatives. The lens has above average sharpness wide open while distortion, chromatic aberration, and flare are all well controlled. The only real glaring weakness of this lens, optically speaking, is the wide-open 'glow' and vignetting (full frame only) through the range at f2.8 which is, unfortunately, its main selling point. The good news is that, from f4 on, this lens is about as good as it gets and, for APS-C shooters, vignetting should be about nil thanks to the crop factor. With all the good and so little bad, I whole-heartedly recommend the Tokina 28-70 f2.6-2.8 ATX PRO if you are budget-conscious and/or don't need the latest features, that is should you be lucky enough to come across one.

The Tokina 28-70 f2.6-2.8 ATX PRO: an all-around solid workhorse of a lens!


Tokina Fan? Check Out These Reviews!

Tokina 100 f2.8 ATX-PRO Macro
Tokina 80-200 f2.8 AT-X
Tokina 80-400 f4-5.6 AT-X
Tokina 17 f3.5 ATX-PRO


Like What You Just Read?

Why not check out other great stuff about photography, astronomy, associated gear, and how to use it.

Think someone else would find this informative (or at least entertaining)? Use the buttons below to share!