Unfortunately, many low-end point and shoot cameras do not offer the RAW option.
The good news is that most cameras work well when set to auto white balance. For natural lighting, the difference between "sunny," "cloudy," "shadow," and "auto" is so minimal that one has to actually look for differences to spot them in most cases. The bad news is that, under artificial lighting, the auto white balance setting ceases to work so well.
Fluorescent lighting is a mixed bag, some cameras do pretty well while others don't do so hot. However, the real Achilles heel of digital cameras is their performance under incandescent/tungsten lighting. To put it plainly, every camera I've ever used (Canon, Nikon, Sony, Olympus) has performed terrible (that's probably too kind a word, but this website is intended to be friendly for all ages) under incandescent lighting. This one fact requires manually setting the white balance from "auto" to "tungsten" when one could leave it alone at all other times.
Enter the problems.
Okay, you're shooting indoors under incandescent lighting one evening. You take the pictures, they look great as you remembered to set the white balance manually, then you go to bed. You get up the next morning and find an eagle sitting in your tree. Quickly, you grab the camera, race to the window, and start snapping before he flies away. The eagle flies away and you decide to review your pictures. Upon review, all of the pictures have an overpowering blue cast to them and look nothing like the scenes you just saw.
Oh #*%^!
Never fear, there is a way to recover your incorrect white balance JPEG images!
All digital cameras (except those picked up at garage sales) come with basic image editing software that allows for the most basic of operations, which typically includes color cast. So, upload your blue pictures and then drop them into your editing software. What follows is a general how-to guide using Photoshop Elements. Your software will probably be different, but the idea remains the same in that the key is changing (sometimes repeatedly) the color cast.
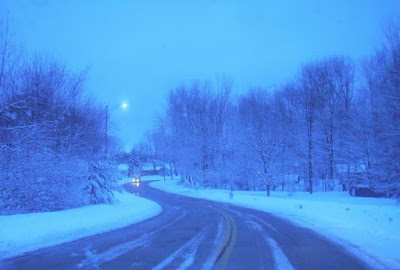
The original image and probably the worst example of a mis-set white balance image that I've shot! Pay attention to the street, there was a definate bluish cast to this morning (hey, I live in Northern Ohio and see snow all the time, so something had to be special!)
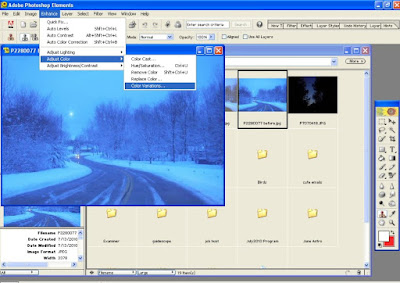 First, opening Elements, go to "enhance" and then to "adjust color." From there, another bar opens to the side, choose "color variations."
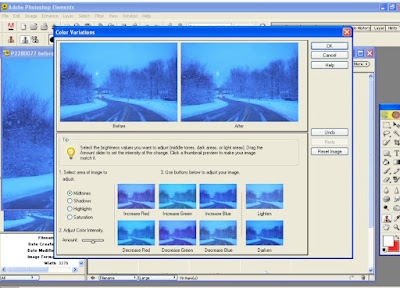 A new window pops up, with the ability to increase/decrease red, green, blue, and brightness.
 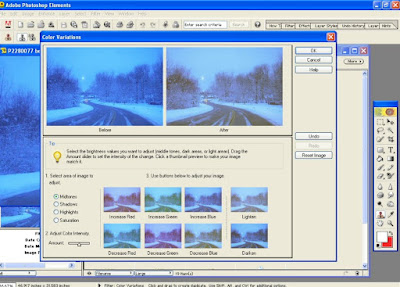 Next (the important part), you adjust your colors. In Elements, this is done with a side-by-side before and after preview screen. Start clicking colors to see your picture change in real time. To fix the white balance, click to reduce blue and add red. Depending on the severity of your incorrect color cast, you may need to reduce blue multiple times. Once you're satisfied with the image, save it.
 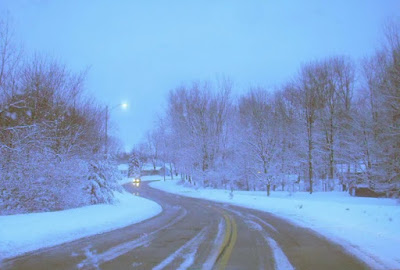 Done, what a difference a few clicks make! (yes, this was a blue morning like this). Again, comapre the street color to that in the original.
Humble requests:
If you found this informative (or at least entertaining), help me pay my bills and check out my Examiner pages for photography and astronomy for more great stuff.
Don't forget to pass this link along, either.
For something even better, become a follower.


No comments:
Post a Comment